and finally! 2 in 1 sock KAL part 5: the toe
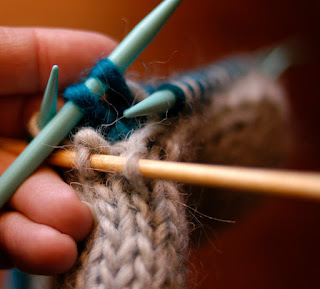
Almost there! So 2" before the final length of your sock you'll start the decreases to shape the toe. Decreasing for the toe is treated the same as the decreases worked for the heel & the gusset in that you'll have to rearrange your stitches to work the SSK's and K2tog's.
Before decreasing make sure your needles are arranged as follows. The needles are usually numbered as #1 being half of the bottom of the foot sts, #2 being all of the top of the foot sts and #3 being the 2nd half of the bottom of the foot sts. So for my sample I had 12sts ea on needles 1&3 and 24 on #2.
K to 3sts before the end of #1 rearrange your sts K2tog for the outer and inner sock, K1 in the usual way. On needle 2, K1, rearrange the sts for a SSK, k to 3sts before the end of the needle, rearrange the sts for K2tog, K1. On needle 3, K1, rearrange for SSK and K to end.
Work an even round between decrease rounds and repeat decrease round even round until the toe is an adequate length to cover your toes. The first pair I made I decreased too many and didn't like the pointy toe look. This one I left more stitches and I think it looks better.
Once the toe is shaped and you're ready to graft you'll again have to rearrange the stitches. Separating the stitches for the inner and outer socks to look like the photo below.
Before decreasing make sure your needles are arranged as follows. The needles are usually numbered as #1 being half of the bottom of the foot sts, #2 being all of the top of the foot sts and #3 being the 2nd half of the bottom of the foot sts. So for my sample I had 12sts ea on needles 1&3 and 24 on #2.
K to 3sts before the end of #1 rearrange your sts K2tog for the outer and inner sock, K1 in the usual way. On needle 2, K1, rearrange the sts for a SSK, k to 3sts before the end of the needle, rearrange the sts for K2tog, K1. On needle 3, K1, rearrange for SSK and K to end.
Work an even round between decrease rounds and repeat decrease round even round until the toe is an adequate length to cover your toes. The first pair I made I decreased too many and didn't like the pointy toe look. This one I left more stitches and I think it looks better.
This is the bottom of the sock, but doesn't it look like a mitten? This technique works for mitts too.
Once the toe is shaped and you're ready to graft you'll again have to rearrange the stitches. Separating the stitches for the inner and outer socks to look like the photo below.
4 needles total.
Once the stitches are arranged this way you can then graft the toes together starting with the inner sock first.
Then the outer sock.
Now there's just one last thing to do besides weaving in ends....
Give a little tug and your 1 sock turns into 2... are immediately grabbed up and happily worn!
It feels good to at least be done with the sample as I still have a ways to go with the Misti sock, but I'm close!
I enjoyed this KAL and plan on doing another one soon I'm thinking a top down sweater with set in sleeves. Hope some of you were inspired to try it and found it easy to follow or maybe you just bookmarked it for a later date in any case I welcome photos anytime!


Comments
Post a Comment